You can’t diagnose or treat a problem if you can’t identify it. Here’s a quick guide on how to navigate the slit-lamp biomicroscope ahead of time to avoid fumbling in front of an anxious patient.
Basic Approach
First, take a quick second to observe the patient as a whole. Once under the microscope, macropathology such as iris heterochromia, periorbital neoplasms and heterotropias can be surprisingly easy (and embarrassing) to miss. Begin with a lower magnification — and fight the urge to jump to obvious lesions. Then figure out your exam algorithm, beginning with external features and working towards deeper structures. Stick to that order so you don’t neglect other important, but more subtle, findings.
Lighting Techniques
Remember that there is a human on the other end of the scope. Cranking up the light intensity may improve your view, but it’s uncomfortable for the patient. If you must do so, give a courtesy heads-up and keep it short. The rule of thumb is to decrease the beam width and/or height as you increase brightness.
Here are a few of the more common and useful lighting techniques that you’ll need to employ:
Diffuse illumination
10x magnification
With this technique, an open beam is directed on the eye at 45°. This is useful for conducting an overall survey of the eye, lids, lashes, caruncle, sclera, surface vessels and media opacities.
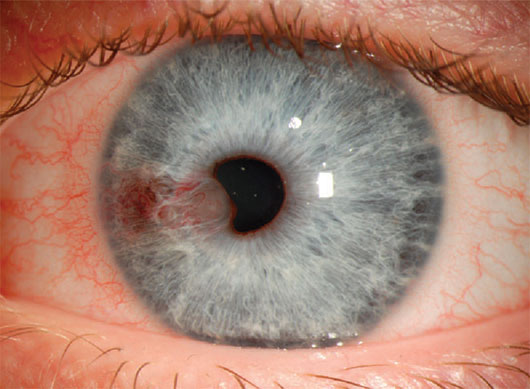
Vascularized iris cysts viewed with diffuse illumination.1
Sclerotic scatter
10x magnification
With this technique, a tall, wide beam is directed straight at the limbus. The light is scattered through the cornea to reveal a general pattern of opacities.
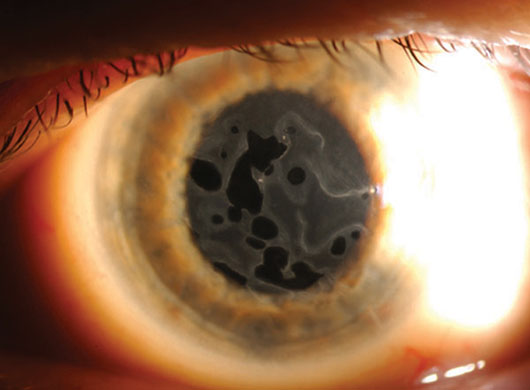
Map-dot-fingerprint dystrophy viewed with sclerotic scatter.2
Retroillumination
10x–16x magnification
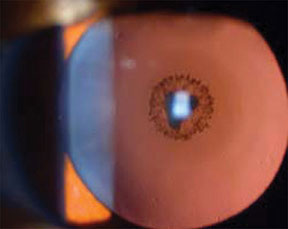
Cataract viewed with retroillumination.3
Iris retroillumination: Light is reflected anteriorly off of the deeper iris to study corneal opacities and guttata.
Red reflex test: A short light beam is directed through the pupil and reflects off the retina to reveal lens opacities (best with dilated pupil) and iris transillumination (best with undilated pupil).
Optical Section
Van Herick’s technique
6x–10x magnification
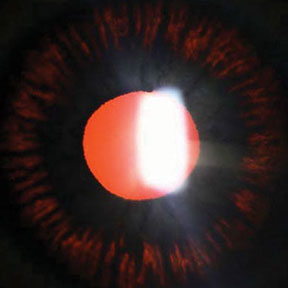
Radial, midperipheral iris transillumination defects in pigmentary glaucoma.4
A narrow slit beam is angled at 60° onto the limbus to estimate the depth of the peripheral anterior chamber. The angle is considered open if the ratio of aqueous to cornea is greater than 1:2 and narrow when this ratio is no greater than 1:4. Note: This method is not appropriate for plateau iris syndrome.
Conical beam
16x–20x magnification
Using the pupil as a dark background, a bright conical beam of light is angled 45° to 60° onto the aqueous to assess cells and flare. This technique also works with a small rectangular beam.
Corneal cross-section
16x–20x magnification
A thin, bright beam is angled at 45° to 60° for a detailed view of the corneal layers. This technique is used to gauge the depth of lesions and any areas of thinning (ulcers and ectasias).
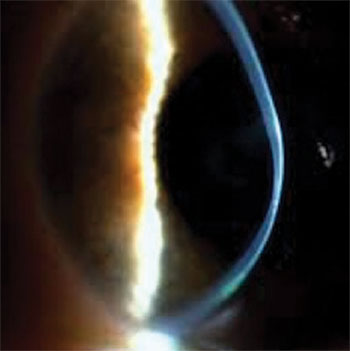
Thinning of the cornea in keratoconus viewed by corneal cross-section.5
Light Filters
Neutral density: This colorless, gray filter reduces illumination for photosensitive patients.
Cobalt blue: This filter is utilized with fluorescein for applanation and to assess the tear lake, tear breakup time, contact lens fit and corneal lesions and defects. It’s also employed in Seidel testing to evaluate aqueous leakage from penetrating/perforating injuries, surgical wounds or thin filtering blebs.
Red free: This filter obscures red light to enhance the observation of retinal nerve fiber layer wedge defects. It also helps differentiate pigmented lesions (which appear dark before the filter is applied) from blood vessels and hemorrhages (which appear dark after the filter is applied).
Yellow barrier: This filter enhances contrast when using fluorescein and the cobalt blue filter.
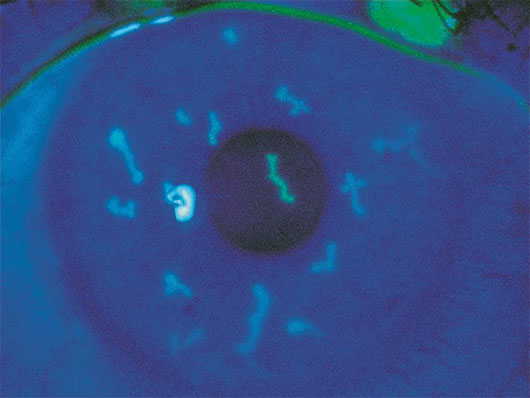
Fluorescein stain highlighting dendritiform lesions in herpetic keratitis.6
References
1 http://eyeworld.org/article-first-ascrs-ops-symposium
2 http://webvision.med.utah.edu/2012/04/map-dot-fingerprint-dystrophy/
3 http://www.molvis.org/molvis/v14/a64/
4 http://webeye.ophth.uiowa.edu/eyeforum/cases/184-pigmentary-glaucoma.htm
5 http://www.kcnz.co.nz/what-is-keratoconus.html
6 https://www.aao.org/browse-multimedia?filter=image
* * *
 About the author: Jiaxi Ding, MD, is undergoing glaucoma fellowship training at the University of Iowa. She joined the YO Info editorial board in 2016.