How to Create Your Slides
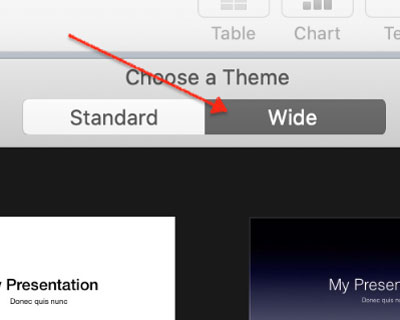
When creating your slide deck, under Choose as Theme select Wide.
- As with any published work, make sure all the slide content is original or properly attributed. Do not use copyrighted material without express permission from the owner.
- We strongly recommend against using any soundtrack or other audio elements in the presentation.
- Keep any animations minimal and professional. We strongly encourage using no slide transitions.
How to Embed Videos for Optimal Recording
If you include any videos in your presentation, we recommend using no more than 1 video file per slide. The timing when recording your slideshow can become complicated with multiple videos.
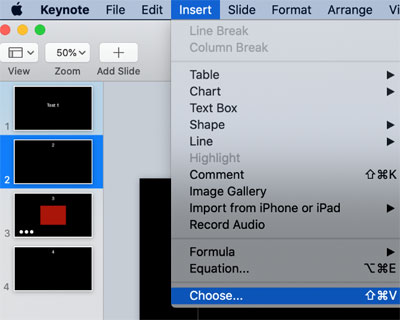
To insert a video in a slide, select “Insert” and then “Choose,” and find video you would like to include from your computer location.
Resize the video to fit your design, content, and layout.
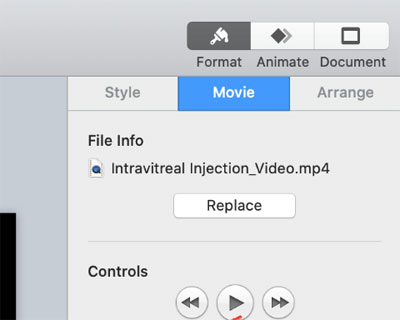
Click on the video and then select “Format” from the upper right-hand menu, and then select “Movie” from the tab.
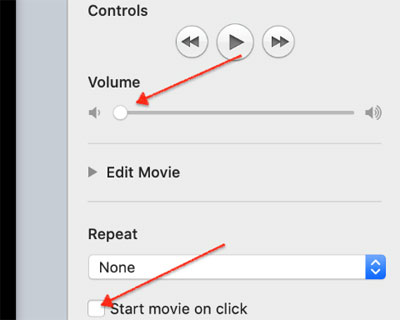
The video will play back as soon as you start the slide, but you can change it to start on command by checking the box for “Start movie on click.” If the video has any existing audio, make sure to mute the video under the same “Volume” setting.
Set Up Your Mic
Most modern computers have a built-in microphone that will be adequate for this recording, but a USB microphone or headset is recommended for improved audio quality.
The built-in microphone will be set as your input device by default. If you plan to use a USB microphone for the narration, be sure to set it as the input device. Each device may follow slightly different steps here, so refer to the microphone manufacturer and your specific computing device for further instructions.
Record the Narration
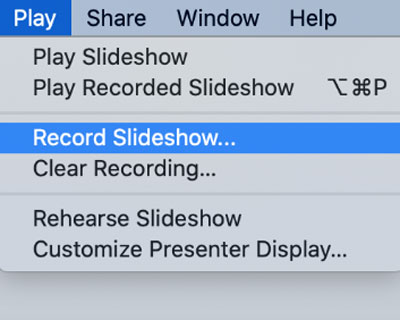
Select the slide where you want the narration to start—in most case this will be the first slide of your deck. Click “Play” in the top menu and then “Record Slideshow.”
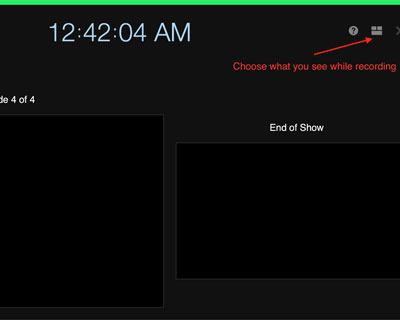
In recording mode, you will see the current time at the top of the screen. Under that you will see the current slide on the left, and the next slide on the right. You can change what you see by clicking the layout icon in the upper right-hand controls.
The recording and playback control are located at the bottom left of the window. To start recording, click the red circle icon at the bottom of the window. The timer begins a 3-second countdown to alert you that recording is about to begin.
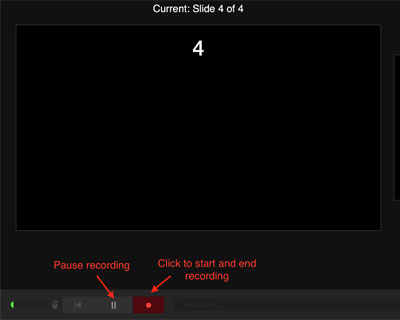
Advance to the next slide using the right arrow on your keyboard. Pause the recording at any time by pressing the pause button in the bottom left-hand corner of the window.
Be careful to give yourself a few seconds between slides to ensure your voice is not cut off.
When you reach the final slide and “End of Show” is displayed in the right-hand slide, select the red circle icon to stop recording.
Click the Escape key or the Exit button to save the recording and return to your slide deck in edit mode.
To check your narration, select “Play” from the top menu and then “Play Recorded Slideshow.” If you’re not satisfied with the narration, repeat these steps to re-record.
Export Your Presentation
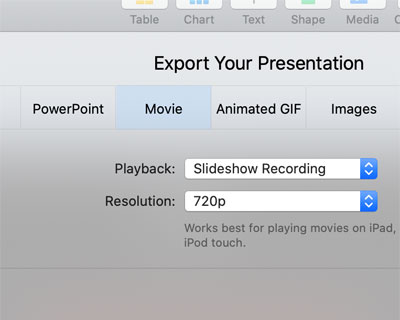
After you finish creating your presentation in Keynote and you’re satisfied with the results, export your presentation to a movie file. Select the “File” menu and then “Export to” and from the drop-down selection choose “Movie…”
Choose “Playback: Slideshow Recording” and “Resolution: 720p” in the Export window. Press “Next” in the bottom right of the window.
Save the file with a unique name to a location on your desktop. Keynote will export the movie as an M4V file.
Depending on the length of your presentation, it may take several minutes to export the file.